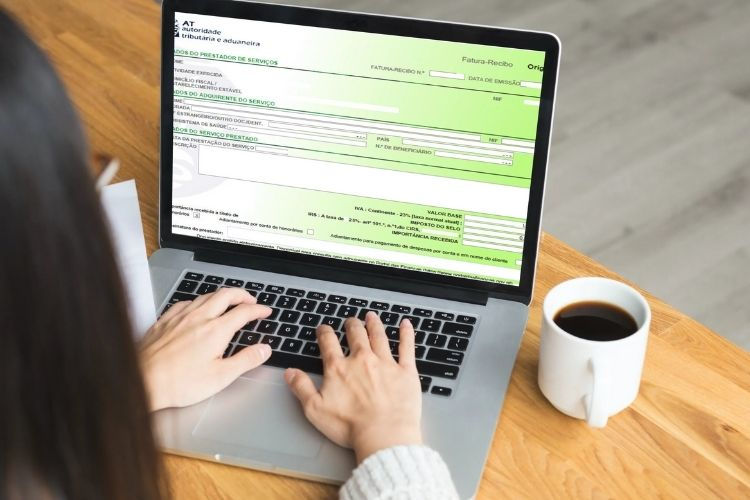
Discover the benefits of Green Receipts in Portugal! These essential documents are commonly used by freelancers and independent workers to receive payments from clients. Recognized as income by the IRS, Green Receipts need to be completed in Anexo B. Best of all, the process is free and can be easily done through the Portal das Finanças. Dive into our comprehensive guide to learn how to create your first Green Receipt effortlessly.

How to Issue a Green Receipt in Portugal: A Detailed 11-Step Guide
1. Login to Portal das Finanças (AT)
- Visit [Portal das Finanças] (https://www.portaldasfinancas.gov.pt).
- Enter your NIF (Número de Identificação Fiscal) and password to access your account.
2. Navigate to the Green Receipt Area
- On the homepage, find and click on the shortcut box "Faturas e Recibos Verdes".
- Alternatively, select "Todos os Serviços" from the left menu, then choose "Recibos Verdes -> Emitir".
3. Choose Between “Fatura ou Fatura-Recibo” and “Recibo”
- After clicking "Emitir," select whether you need “Fatura ou Fatura-Recibo” (for combined service and payment proof) or “Recibo” (proof of payment issued after a Fatura).
Explanation:
- Fatura: Acknowledges the service provided but not the payment.
- Fatura-Recibo: Confirms both the service provided and payment received (useful for immediate payments).
- Recibo: Issued after a Fatura to confirm payment received.
4. Issue Fatura or Fatura-Recibo
- For Independent Workers: If your activity is registered, you can issue as many documents as needed.
- For Non-Registered Activities: Issue an "Isolated Act" (once a year). Follow a separate guide for detailed steps on filling an Isolated Act.
Tip: For simplicity, choose Fatura-Recibo to avoid issuing a separate Recibo after a Fatura.
5. Fill Out the Remaining Data
- Your details (name, NIF, address) should auto-fill. Confirm their accuracy.
- Enter client information: country, company name (legal name), address, and NIPC (tax number).
6. Select “Importância Recebida a Título de”
- Choose the nature of the transaction:
- “Pagamento dos bens ou serviços” (Payment for goods or services).
- “Adiantamento” (Advance payment).
- “Adiantamento para pagamento de despesas por conta e em nome do cliente” (Advance for expenses on behalf of the client).
- Provide a brief description of the service.
7. Enter “Valor Base” (Gross Amount)
- Input the total value of your service before VAT.
8. Select the VAT Regime
- This step determines your VAT obligations:
- Exempt (Art. 53º do CIVA): For independent workers earning less than €12,500 annually.
- Exempt (Art. 9º, 13º, 14º, 15º): For specific exempt activities.
- Standard VAT: If no exemptions apply, select the appropriate VAT rate (6%, 13%, or 23%).
9. Base de Incidência em IRS (for Fatura-Recibo)
- For Portuguese entities, select the appropriate IRS withholding tax:
- Non-Residents: Choose "Sem retenção - Não residente sem estabelecimento".
- Art. 53.º Regime: Exempt from withholding tax, select “Sem retenção – Art. 101., nº1 do CIRS”.
- Standard Regime: Choose the applicable withholding rate (100%, 50%, or 25%).
10. Retenção na Fonte (Source Withholding)
- Select your retention tax rate based on your profession:
- 25%: For doctors, lawyers, architects, etc.
- 20%: For specific technical and artistic professionals.
- 16.5%: For intellectual property income.
- 11.5%: For other independent workers not listed in Art. 151.º do CIRS.
11. Issue the Green Receipt
- Carefully review all entered information.
- Click "Emitir" to finalize and issue the Green Receipt.
Final Advice:
- EU Transactions: Even if VAT-exempt, report all invoices issued to EU countries in the following month using the "Mapa Recapitulativo".

Adoro explorar sites de apostas e recentemente descobri um que realmente se destaca para quem está em Brasil. A interface é simples e intuitiva, repleta de opções de apostas que tornam a experiência de navegação fluida e fácil. Foi uma surpresa agradável ver a variedade disponível, especialmente para alguém que é novo em apostas, como eu. Fazer apostas em onebra entrar Brasil é rápido e sem complicações. Acho que você vai adorar tanto quanto eu.
Costumava trabalhar muito no computador e ganhava algum dinheiro pelo meu trabalho. Mas depois descobri um WeissBet que é muito popular em Portugal e no qual muitos jogadores confiam. E foi aqui que consegui ganhar o meu primeiro grande prémio. Penso que esta é uma óptima maneira para quem quer ganhar dinheiro rapidamente.